If you’re seeking a Windows 10 migration tool, you’re in the right place. In this article, we’ll show you how to choose the suitable tool and explore the process of migrating Windows 10 to a different hard disk with it.
File name: windows-10-migration-tool-3690-gc.html
Why migrate Windows 10 to another hard disk?
Migrating your Windows 10 operating system to another hard disk can be beneficial for several reasons. Let’s explore a few common reasons:
Upgrading storage capacity: If you’re running out of space on your current disk and need additional storage, migrating to a larger hard disk allows you to accommodate more files and applications without compromising performance.
Replacing a faulty disk: In the unfortunate event of a hard disk failure, migrating Windows 10 to a new disk ensures that you can quickly resume your work without losing any data.
Improving performance: Since the difference between SSD and HDD, upgrading to a faster SSD can significantly enhance your system’s performance, reducing boot times and speeding up application loading.
If you want to effectively perform a Windows 10 OS migration, it’s of vital importance to choose a good Windows 10 migration tool. In the following part, you can learn how to choose the most suitable one according to your situation.
Choosing the right migration tool
To simplify the migration process, it’s crucial to select the right migration tool. There are several Windows migration tools available that specialize in migrating Windows operating systems. Choosing a tool that suits your requirements in terms of ease of use, compatibility, and features.
When choosing a migration wizard on Windows 10, you need to pay attention to the following points:
- Compatibility
The migration tool you choose should be compatible with your version of Windows 10. Check if it supports both the current operating system version and the version you intend to migrate to. Because compatibility issues can lead to errors and compatibility conflicts during the migration process.
- Ease of Use
Look for a migration tool that offers a user-friendly interface and a straightforward migration process. A tool with intuitive navigation and clear instructions will save you time and effort. Consider whether the tool provides a step-by-step guide or wizard to assist you through the migration process. Additionally, a tool with a visually appealing and organized interface can enhance your overall experience.
- Feature Set
While the core functionality involves transferring your operating system, applications, and data to a new disk, additional features can add value to the tool. Some useful features need to look for, such as selective migration ability, incremental backup, cloning capabilities, etc.
- User Reviews and Reputation
Research user reviews and testimonials to gauge the reputation and reliability of the migration tool. Look for feedback from users who have successfully used the tool for Windows 10 migrations. Pay attention to reviews that highlight the tool’s performance, ease of use, and reliability.
- Pricing
Consider your budget and evaluate the pricing structure of the migration tools you are considering. Many tools require a one-time purchase or subscription. Compare the features offered by different tools with their respective pricing to determine the best value for your needs. Keep in mind that a good migration tool is an investment that can save you time and effort in the long run.
The best migration tool for Windows 10- AOMEI Partition Assistant
When it comes to Windows transferring tool, there is one standout recommendation: AOMEI Partition Assistant Professional. With just a few clicks, this remarkable tool allows you to effortlessly migrate Windows 10 to SSD/HDD.
In addition to OS migration, this wonderful tool provides various functionalities to meet your diverse needs. It offers a range of impressive features, including the ability to convert MBR to GPT on Windows 10, clone the entire hard drive, move installed programs to another drive.
To experience the power of this Windows 10 migration tool, you can download the demo version and enjoy a free trial. Discover the simplicity and efficiency of installing Windows 10 on a new SSD laptop with ease.
Let’s delve into the functionality of this migration tool for Win 10.
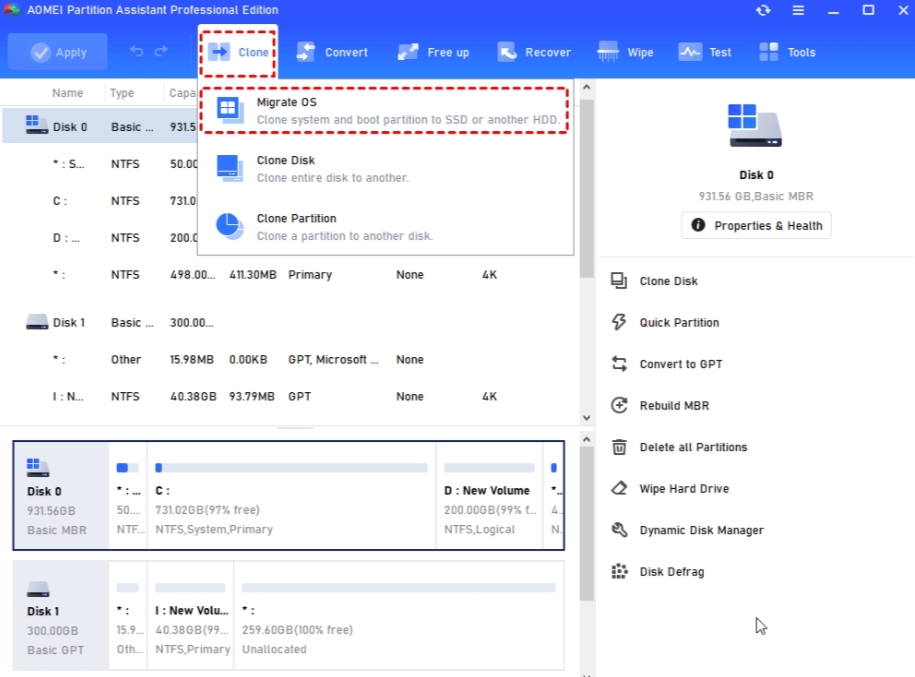
Note: Before you begin, ensure that the target SSD is connected to your PC.
Step 1. Start by downloading and launching the Windows partition manager. Locate and click the “Migrate OS” button to initiate the process.
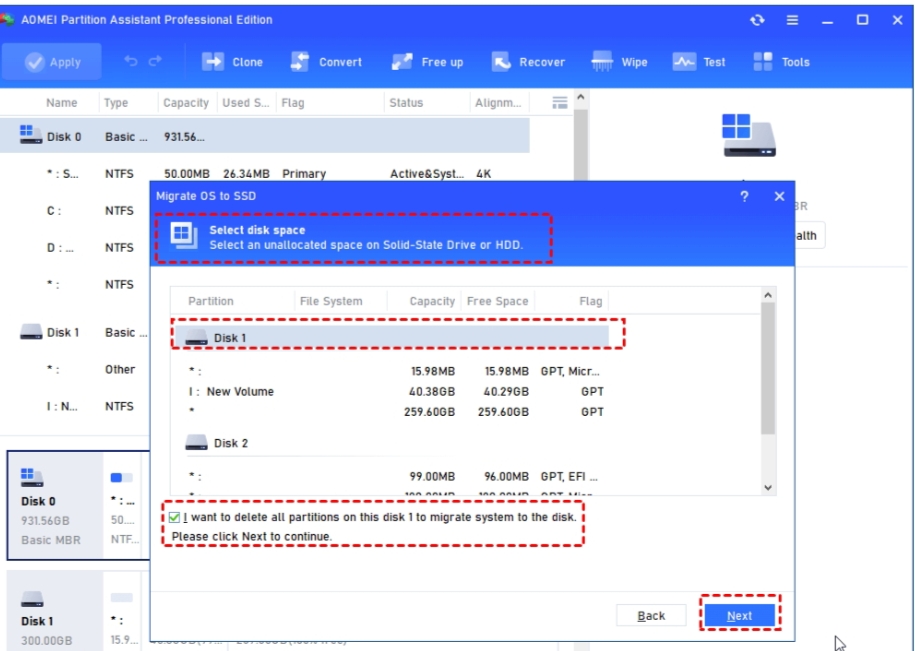
Step 2. Choose the unallocated disk space and make sure to check the displayed note. Then, click “Next” to proceed.
Step 3. Adjust the partition size by either dragging the double arrow or directly inputting the desired size in the provided field. Once done, click “Next” to proceed and learn about booting from the target SSD.

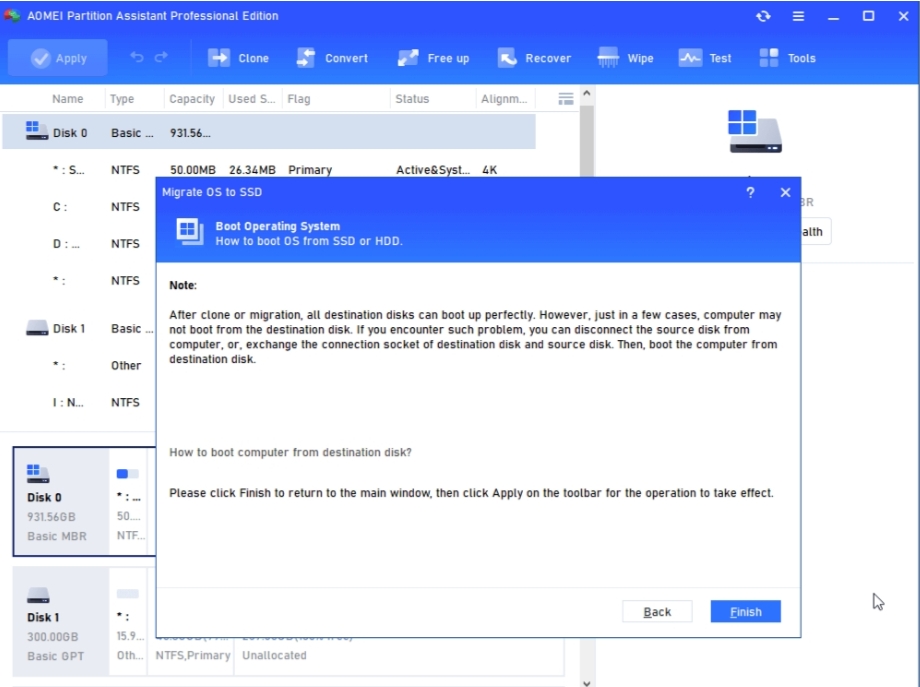
Step 4. Take a moment to read the note provided and then click “Finish” to proceed.
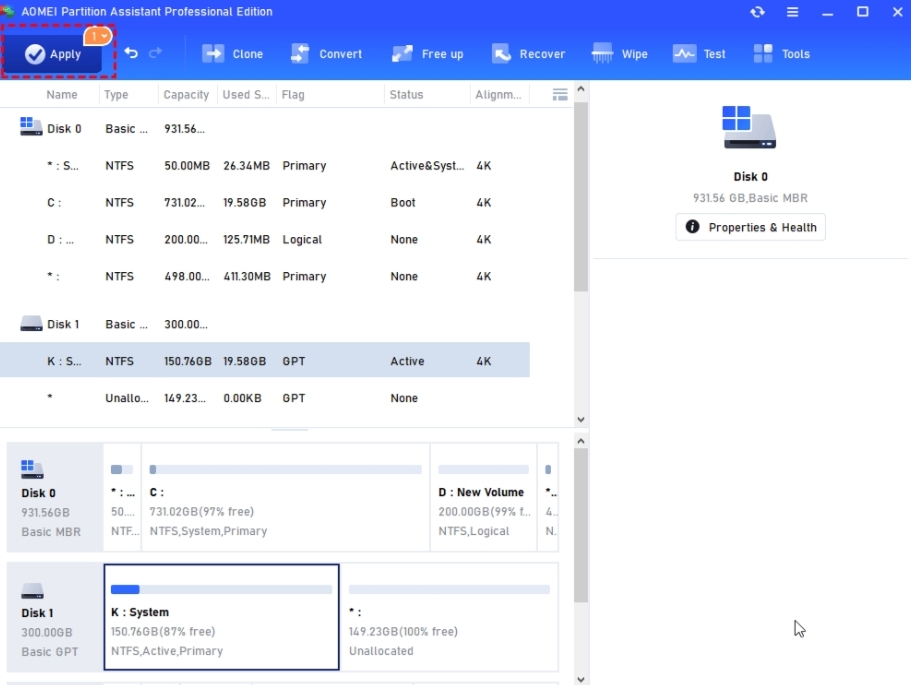
Step 5. To initiate the transfer of the Windows OS, click “Apply” followed by “Proceed.”
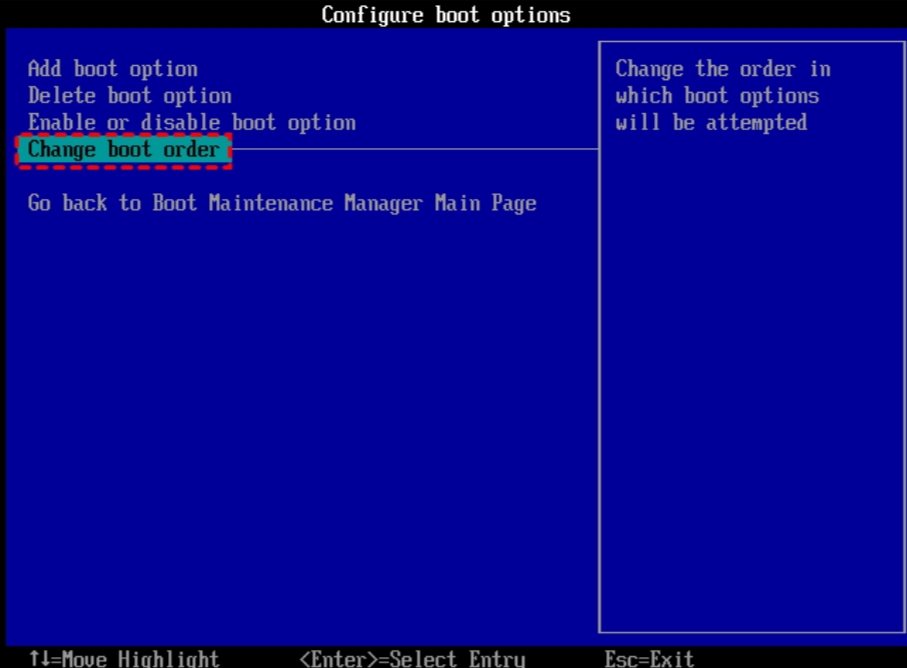
Step 6. As the Windows OS has been successfully moved, it is crucial to change the boot drive. Failure to do so may result in an inability to boot the Windows system.
Conclusion
When you need a Windows 10 migration tool, don’t miss this post. By following the content provided, you can not only learn how to select the most suitable OS migration utility, but also get the detailed steps to do it.